Adjust Levels | Photoshop
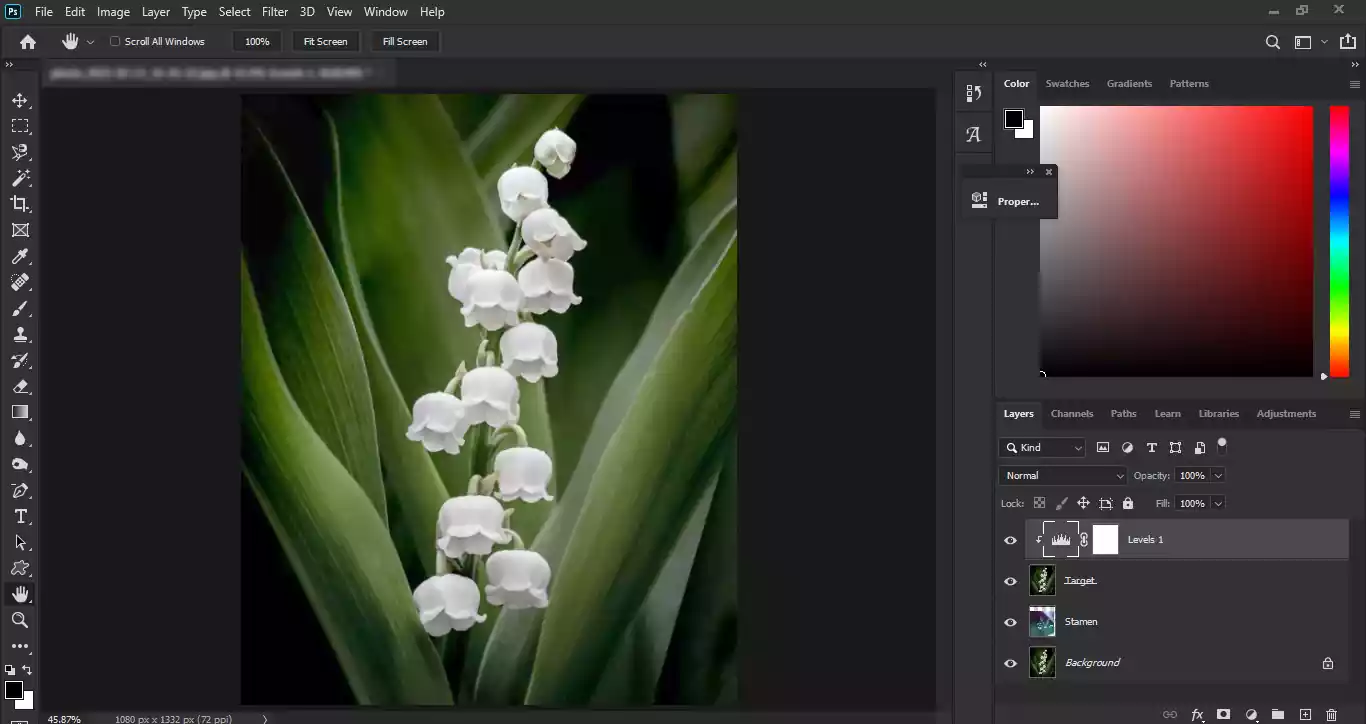
Levels is a handy tool for editing photos. You will deal with this tool a lot in the future. The Levels tool helps to correct excessive brightness or darkness of the image. So, let’s answer the question of how to adjust Levels in Photoshop.
Sometimes when shooting, we can not adjust the light and white balance properly due to haste. Sometimes, the ambient light is inappropriate. In both cases, we see a photo with a good structure and subject, but it is unclear.
Where is the levels adjustment layer in Photoshop
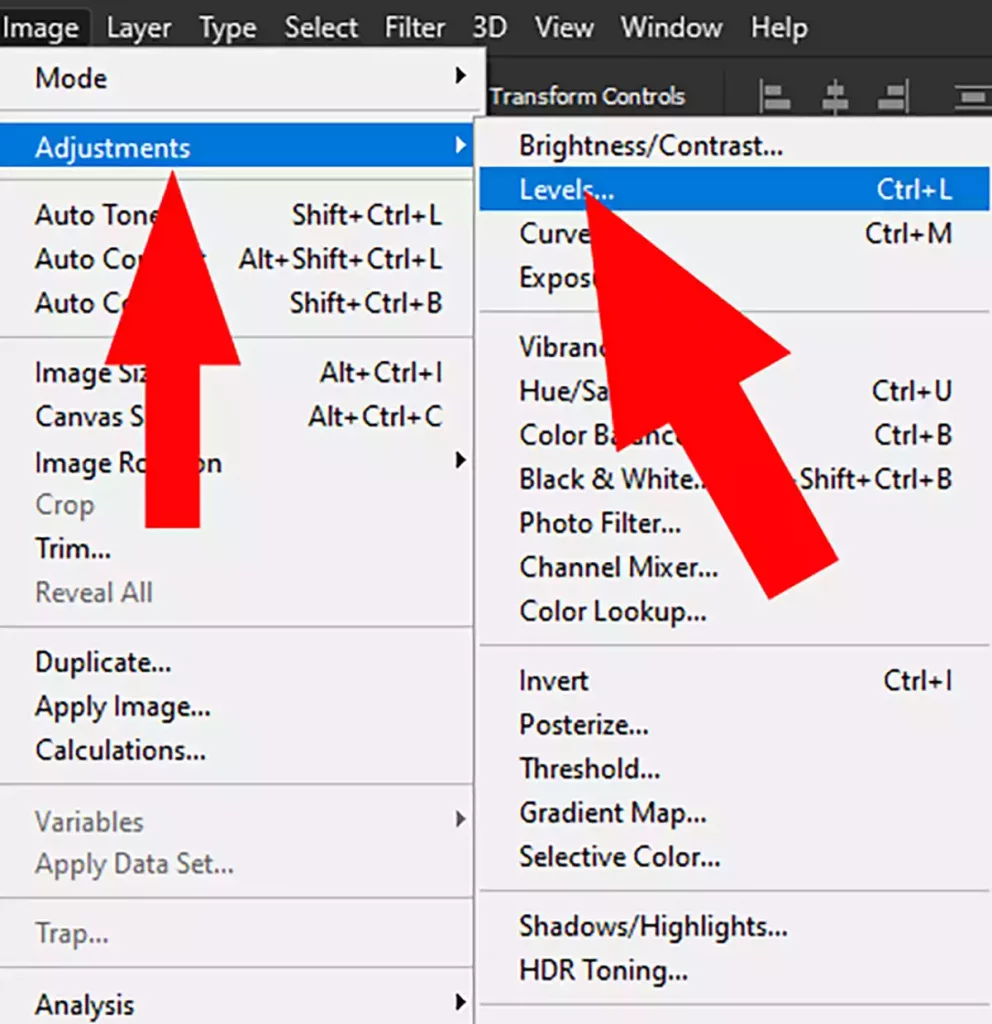
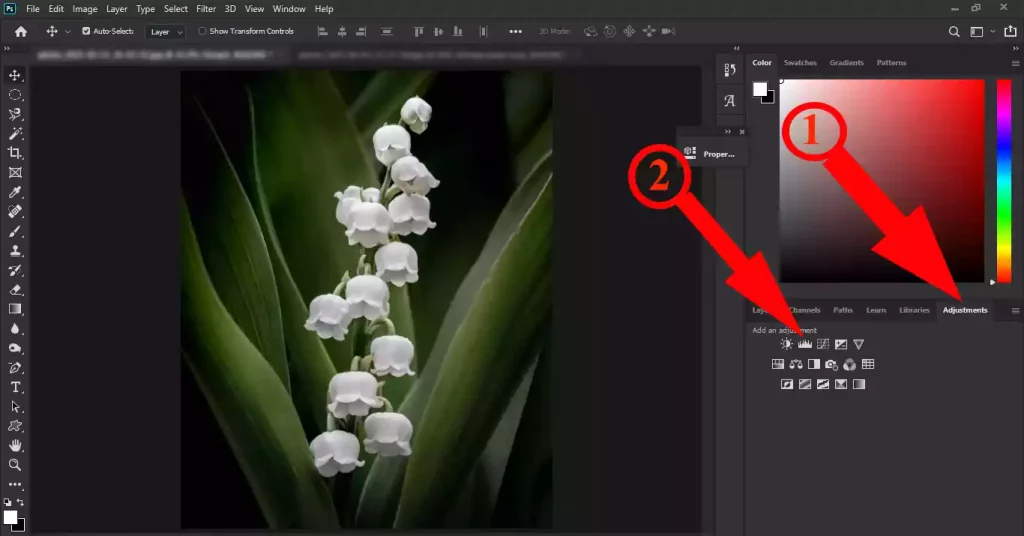
There are two ways to use Levels. The first way from the Images menu is to go to the Adjustments and then click on Levels. ( Visit Types of Adjustment Layers in Photoshop to read more articles about photo editing. )
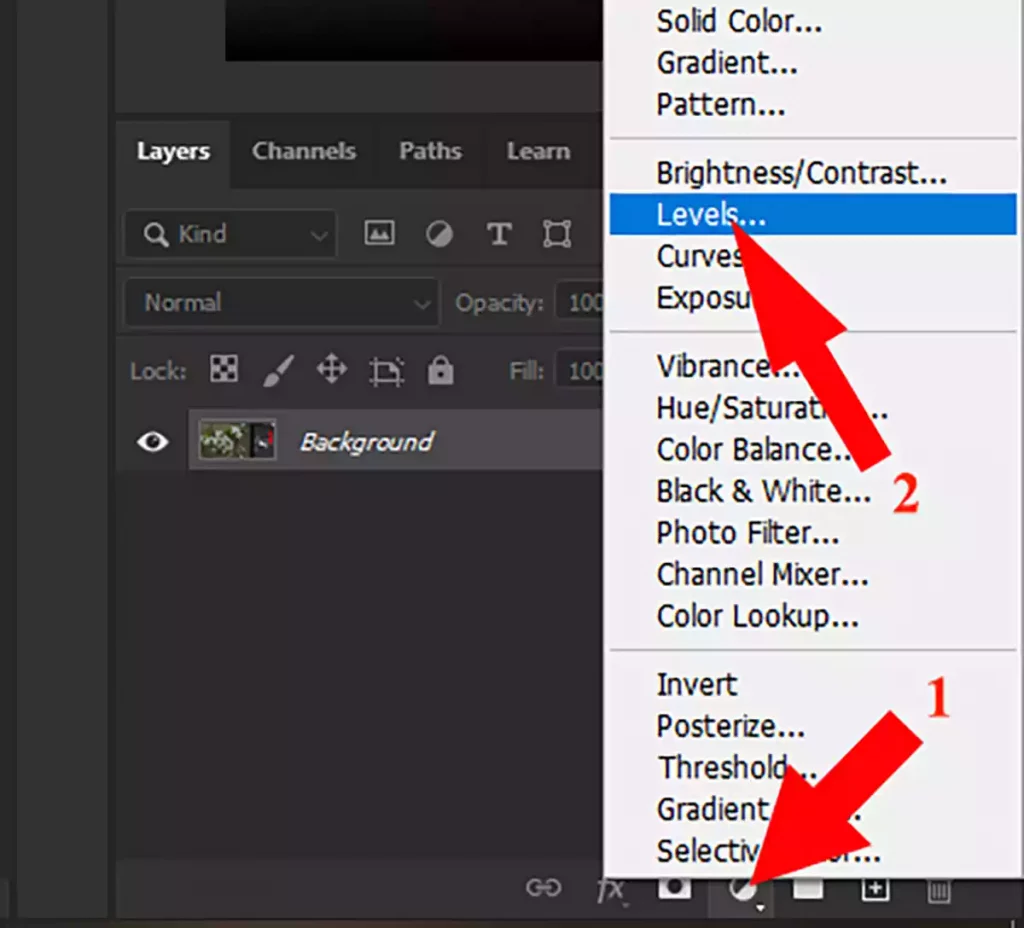
The second method is a better solution for adjusting levels in Photoshop. Click “create new fill or adjustment layer” in the Layer panel and select the levels. This method is more flexible than the first.
How to use histogram and sliders in Levels
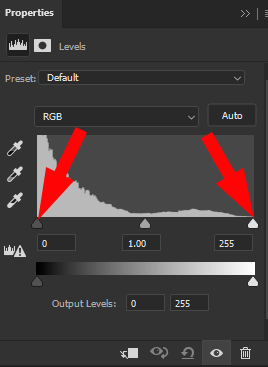
In the image below, you can see the Levels Properties box. A histogram in the center specifies the image’s light status; below the histogram, there are three sliders on the sliding bar.
If the histogram on the right or left does not fill the box, you can move the slider on the same side until it reaches the histogram.
To adjust levels in Photoshop this work reduces noise, making the colors more apparent. Moving the sliders on the slide bar to the left brightens the image, and conversely, moving the sliders to the right reduces the picture’s light.
( Please look at Open Raw Images to read more about opening images in raw format )
The middle slider is more like an equilibrium point, which I will explain later.

To adjust levels in Photoshop, it will be easier to make all these changes on the RGB channel that is selected by default. However, it is possible to work on each color channel separately.
If you do not want to get involved in these details, you can click the Auto button to do all the software itself but do not expect a very professional result.
The middle slider is used when the correction with the left and right sliders based on the histogram makes a lot of changes in the image, and some adjustments with the middle slider are necessary.
Below each slider (left and right) are numeric values from zero to 255, through which you can make changes. The middle slider’s number is 1, which can be changed to more or less and is the equilibrium point.

In the image below, there is a space between the histogram and the slider on the left, and the image is slightly darker. In the next step, to adjust levels in Photoshop, correcting the left slider makes the picture more apparent, the colors more prominent, and the useless light spectra are removed.
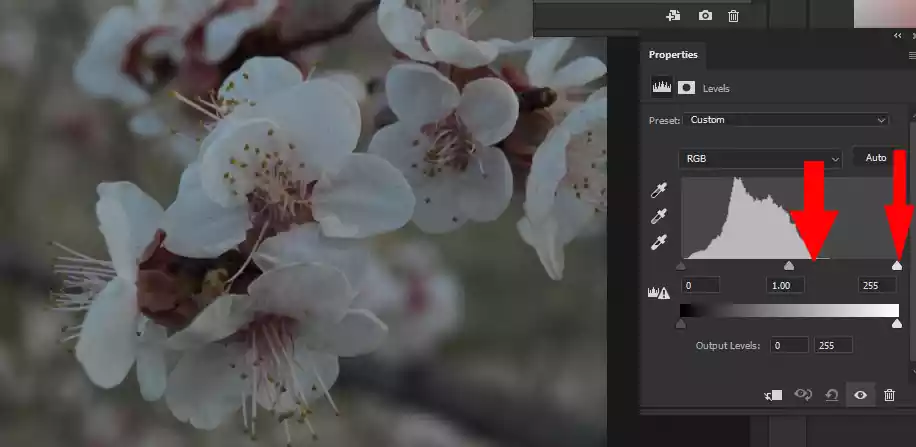

If there is a case where the histogram fills the entire frame, it is better not to use Levels because the image quality may be damaged. In such cases, you can use other tools.
How to adjust levels in Photoshop on one layer
The Levels tool usually affects all of its underlying layers (this is true of all Adjustments layers), but you may want the levels to affect only one layer.
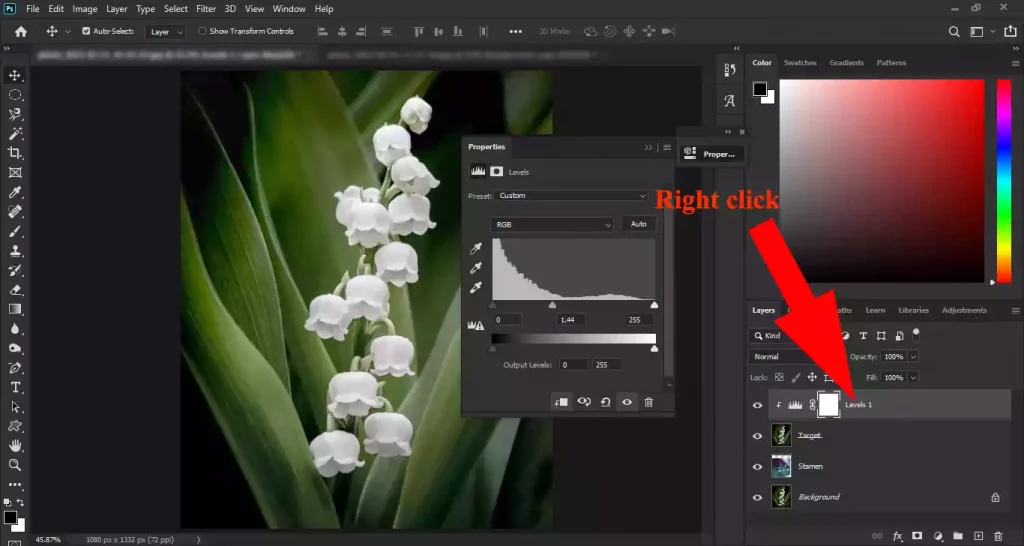
I named that layer the target here. Select the target layer.
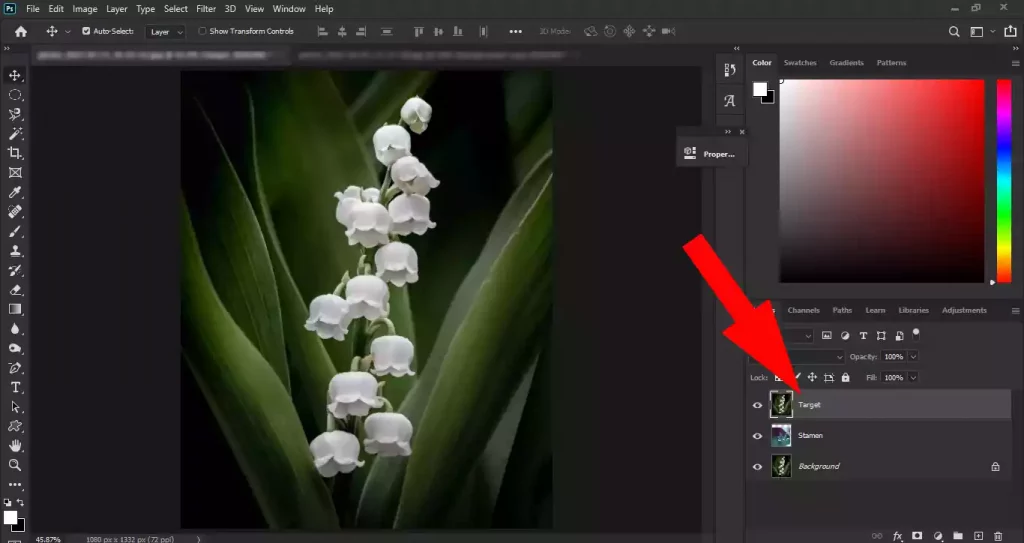
From the adjustments panel, click Levels. This new layer of Levels Adjustments has affected all the underlying layers.
You will notice that this new layer of Levels Adjustments has affected all the underlying layers.
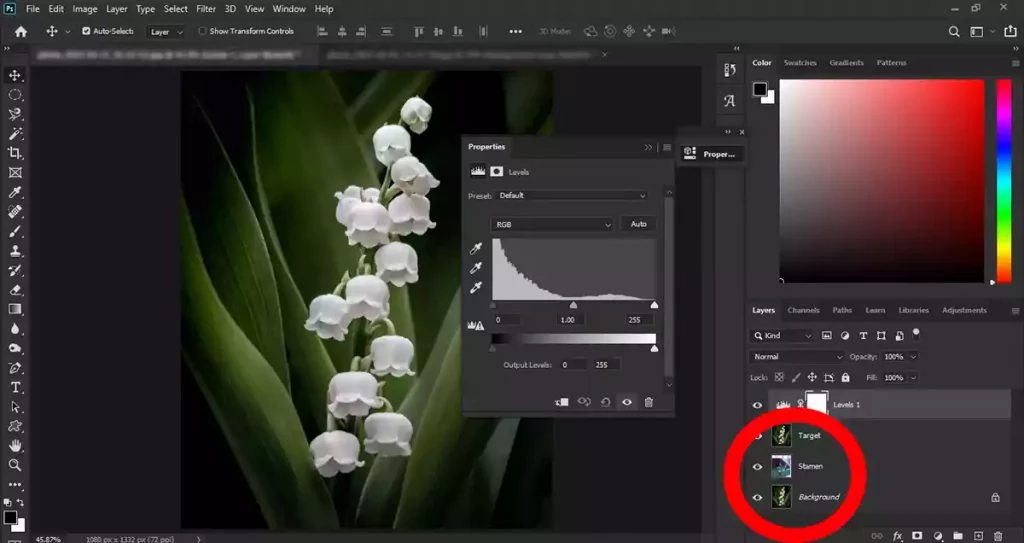
To affect only the target layer, right-click on the Levels layer and select Create clipping mask.
