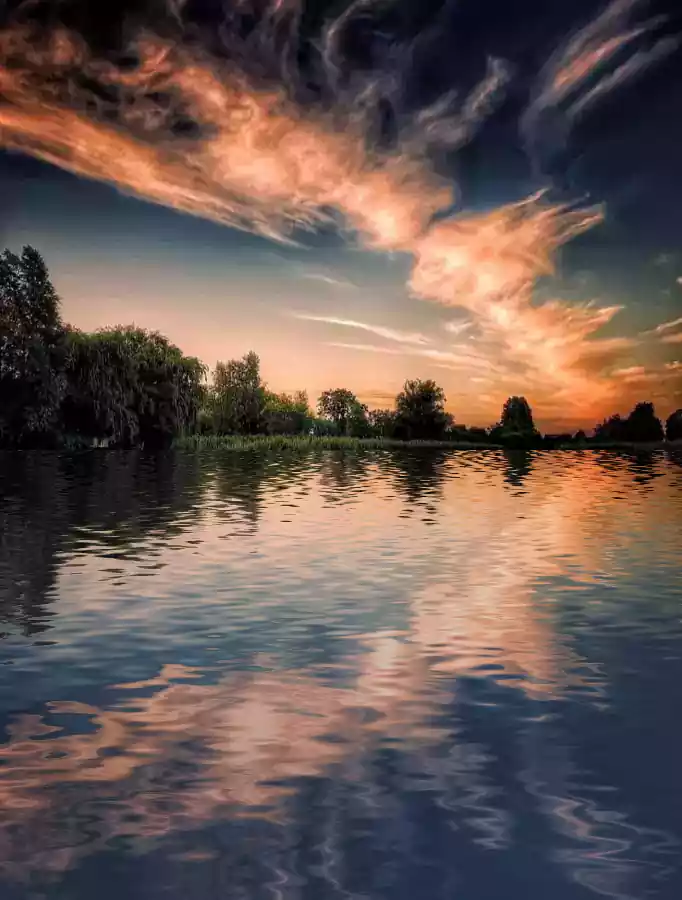
How To Make Water Reflection Effect In Photoshop In 15 Steps
How to create seawater waves in Photoshop so that the reflection of the earth's components looks ultimately natural?

This article will discuss creating the Water Reflection effect and water waves simultaneously in Photoshop.
First, we will create the reflection, then add the blue color, and in the last step, we will make the sea waves.
Topics
- How to create a water reflection effect in Photoshop
- 1: Create a new layer
- 2: Duplicate the Photo Layer and name the new layer “Reflection.”
- 3: Convert Reflection to smart object
- 4: Using Canvas Size to make more space to create the water reflection effect
- 5: Using Flip Vertical for the Reflection layer
- 6: To The Reflection, Add Motion Blur
- 7: Adding a blue effect to the Reflection layer
- 8: Last step to create water reflection effect in Photoshop: Add layer mask
- You need water waves to make the water reflection effect in Photoshop look natural
- Sources
How to create a water reflection effect in Photoshop

1: Create a new layer
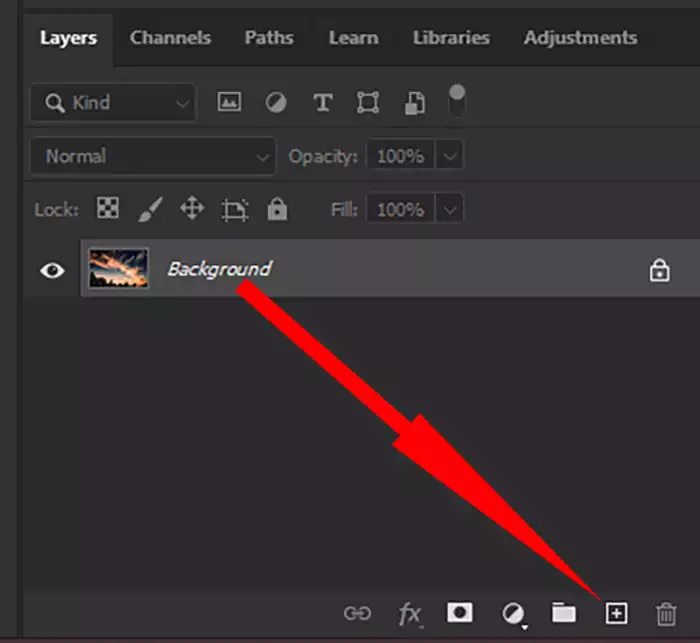
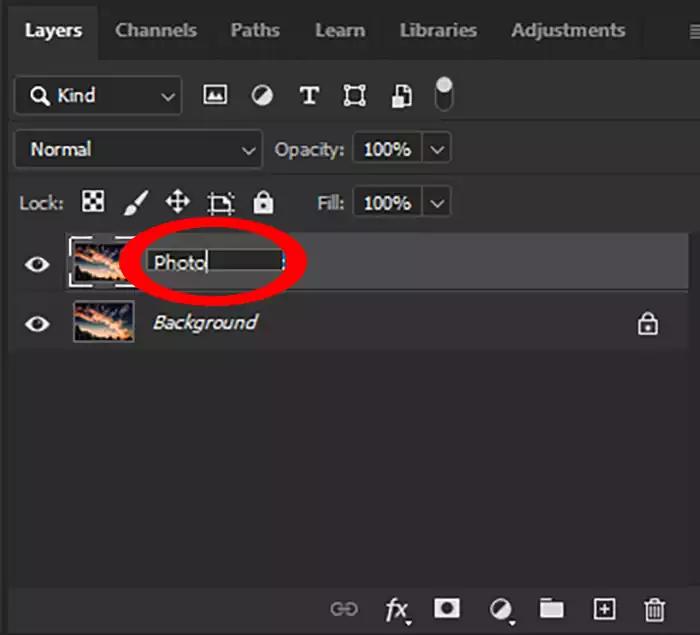
Duplicate the Background layer by dragging it to the Create new layer button. Then double click on Background Copy text and name it “Photo.” ( Visit How to Create Cool Effects in Photoshop to read more articles about effects. )

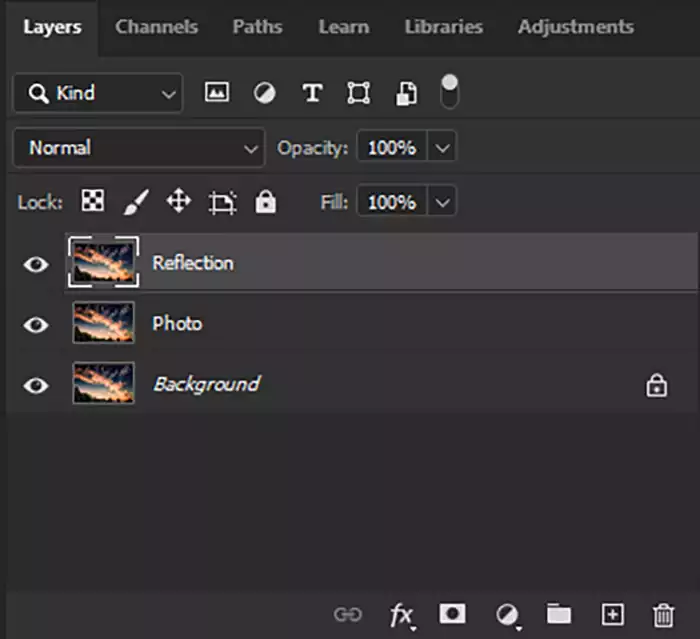
2: Duplicate the Photo Layer and name the new layer “Reflection.”
3: Convert Reflection to smart object
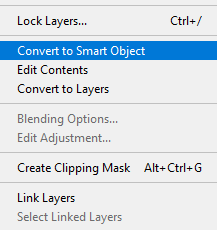
Select the Reflection layer, Go to the top left menu in the Layers panel, and click Convert to Smart Object.
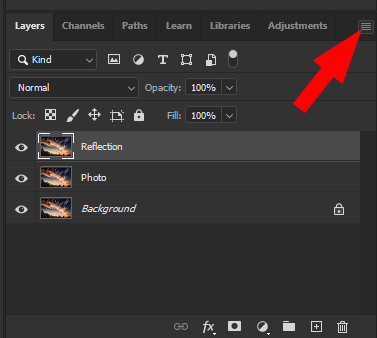
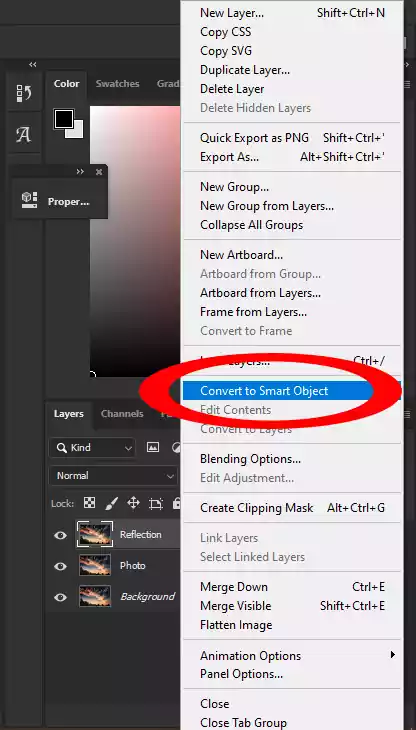
( Please look at How to Adjust Levels in Photoshop to read more about adjusting Levels )
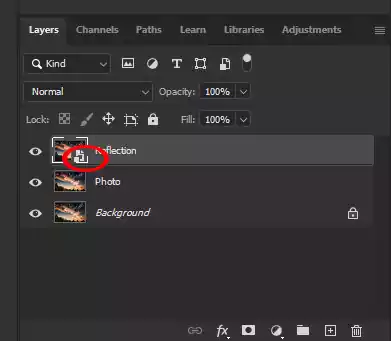
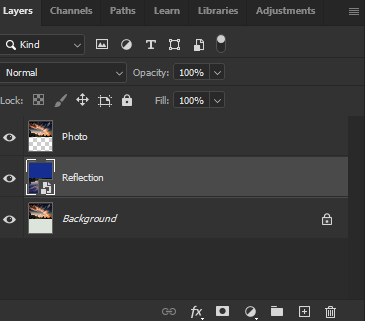
The “Reflection” layer’s preview thumbnail now has a Smart Object icon in the lower right corner, indicating that it is a Smart Object. Any filters applied to the layer will now be editable Smart Filters.
4: Using Canvas Size to make more space to create the water reflection effect
On the way to creating a water reflection in Photoshop, we need to create the same amount of space to make a reflection of the photo. To do this work, we use Canvas Size. First, go to the Images menu and click on the canvas size.
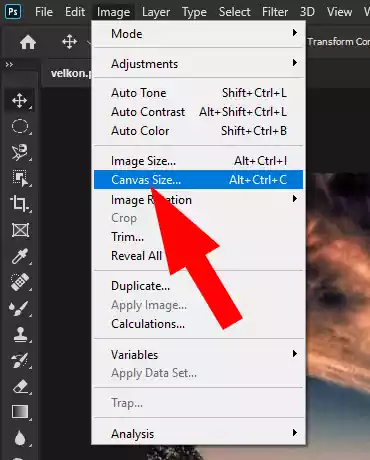
You will be more comfortable using the percentage criterion in the canvas size box. Set the width to 100% and the height to 200%. Click on the middle square in the anchor section from above. Then click OK.

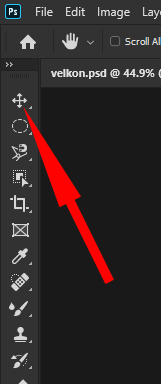
Choose Move Tool, then select Reflection layer. And now, press the Shift key and drag the Reflection layer to fill the empty space.
5: Using Flip Vertical for the Reflection layer
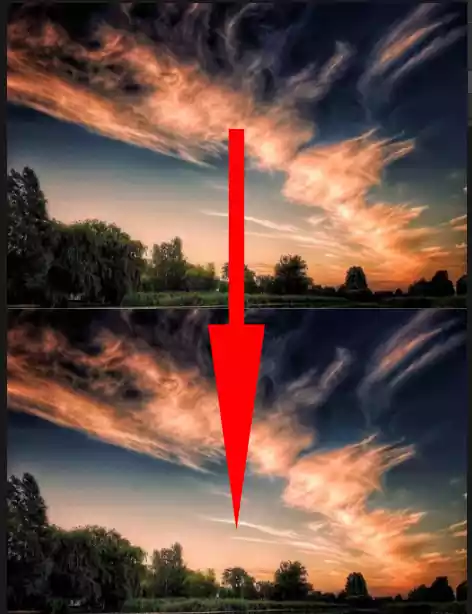
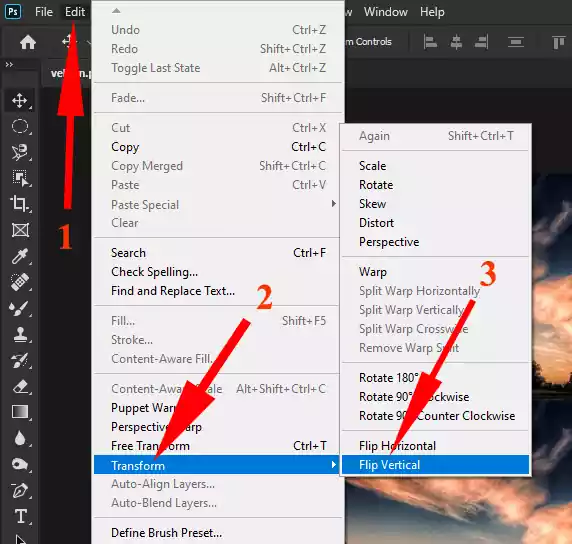
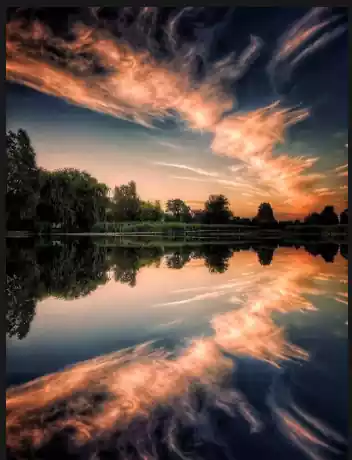
To create a water reflection in Photoshop, select the Reflection layer, and from Edit in the menu bar, go to Transform, then choose Flip Vertical. As a result, the reflection layer will be a mirror of the photo layer.
6: To The Reflection, Add Motion Blur
Drag down the Reflection layer below the photo layer.
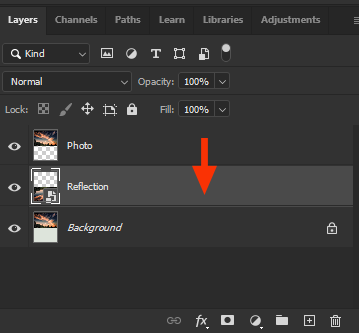
The reflection image should be slightly blurred compared to the Photo. Then, we add some Motion Blur to the reflection layer.
Go to the Filter menu, select Blur, and click on Motion Blur.
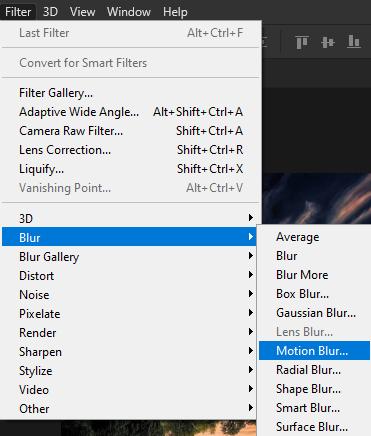
Depending on the size of the image, set the angle to 90 and the distance to 10 and 20.
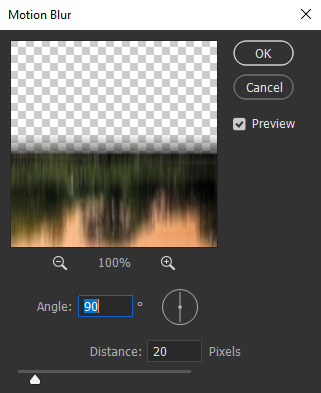
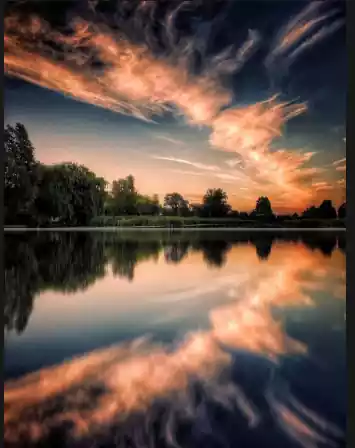
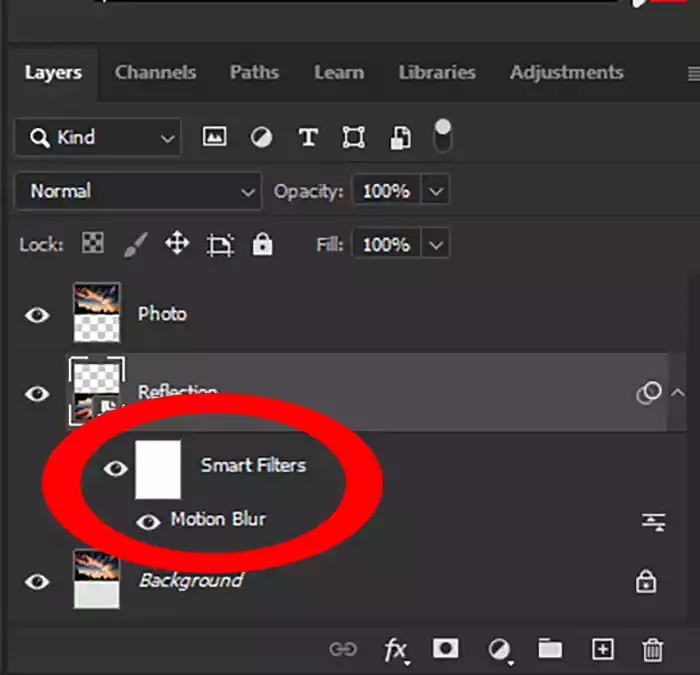
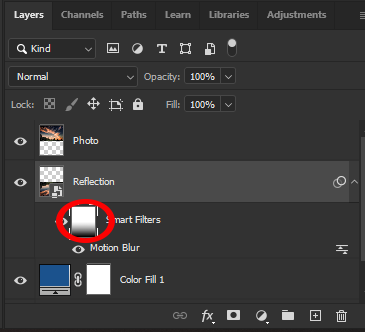
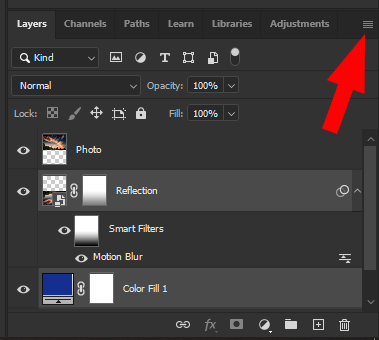
The Motion Blur filter appears as a Smart Filter underneath the “Reflection” layer in the Layers panel. Double-click on the words “Motion Blur” to re-open the filter’s dialog box and alter the Distance value as needed:
7: Adding a blue effect to the Reflection layer
Click Create New Fill or Adjustment Layer to create a blue color in the reflection layer, then choose Solid Color. Depending on the color of the image, choose a type of blue spectrum.
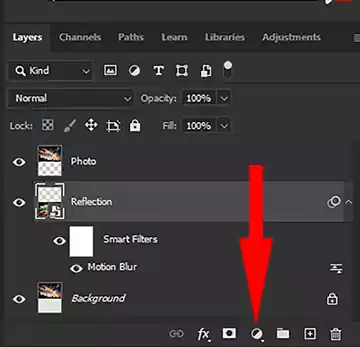

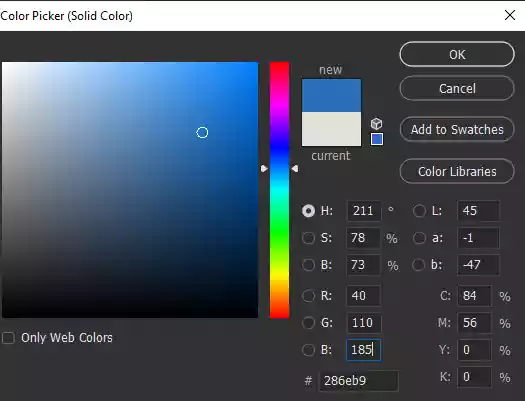

Drag the Fill Layer to the bottom of the “Reflection” Layer. As a result, the blue color disappears.
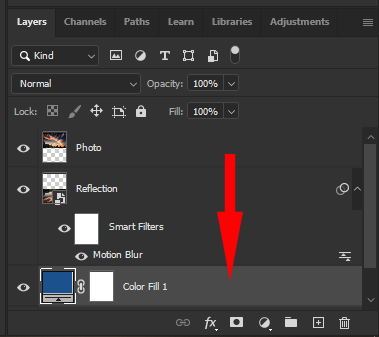
The Smart Filter Layer Mask should be selected. Click on the Smart Filters thumbnail.
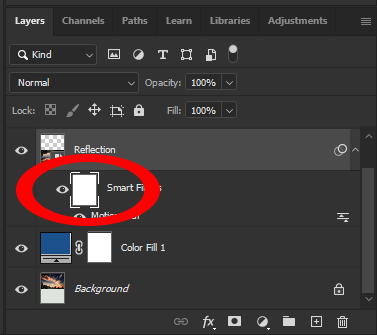
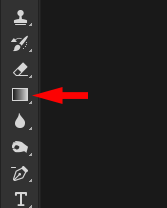
Now select Gradient Tool in the toolbar.
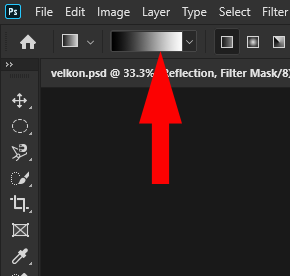
In the options bar, click on the Gradient Color Swatch. The Gradient Editor will then appear. In presets in the Basic category, choose the Black to White gradient, the third thumbnail from the left at the top.
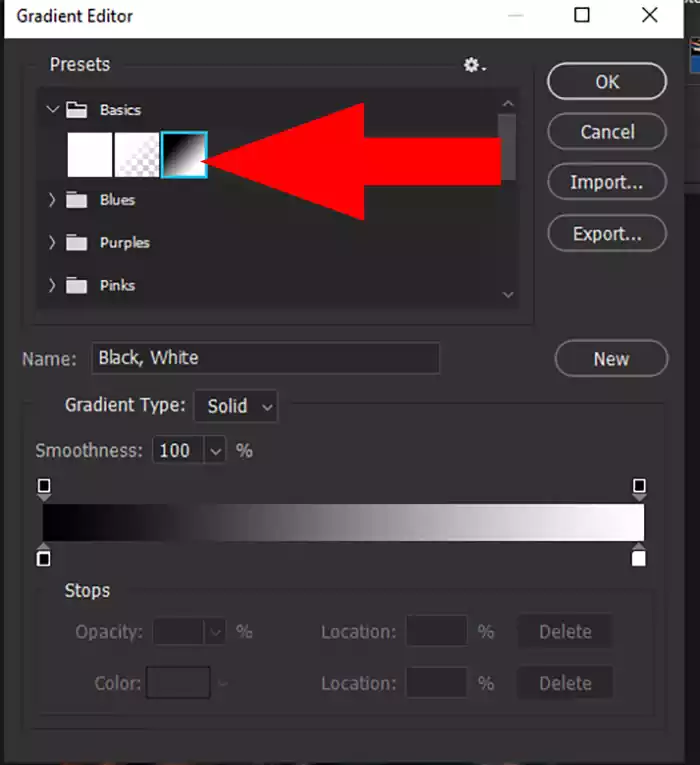
Linear Gradient should be selected in the Gradient Options bar.
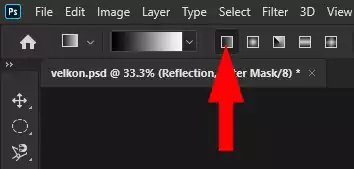
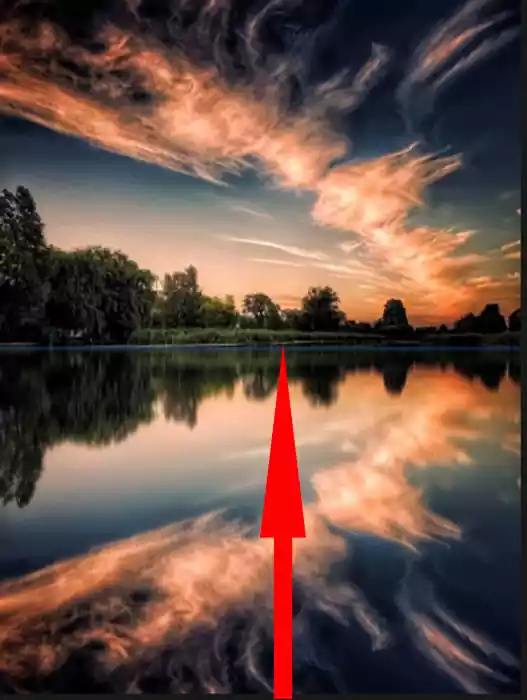
Drag the mouse down from the bottom of the image to the middle while holding the Shift key. I meant from the bottom to the top of the reflection.
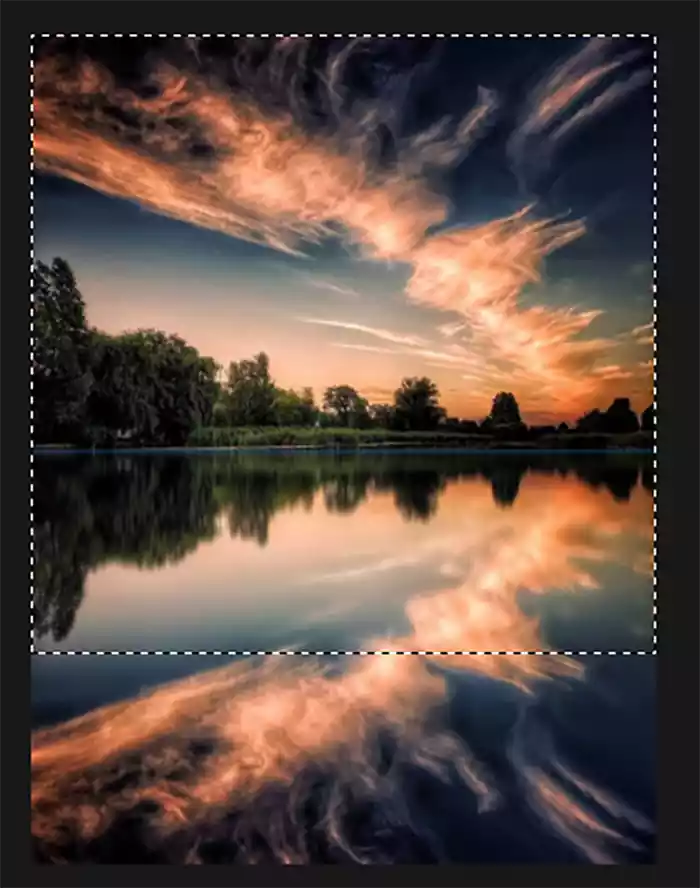
Press the Ctrl and click on Smart Filter’s layer mask thumbnail. This sets the layer mask as a selection (the document will show a selection outline):
8: Last step to create water reflection effect in Photoshop: Add layer mask
To create the water reflection effect in Photoshop, select the Reflection layer and click Add Layer Mask. The blue color will be applied to the Reflection layer based on the mask layer created by the Gradient Tool.
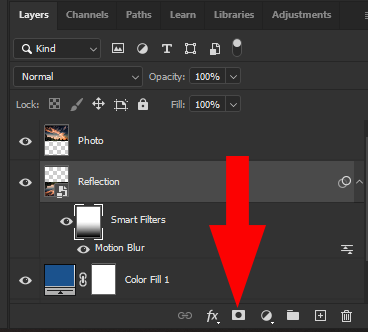
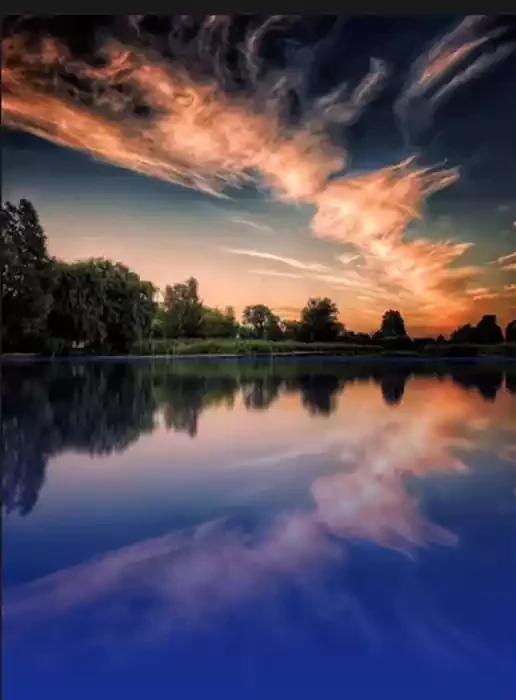
If the blue color is too intense, you can select the layer mask thumbnail on Reflection, open properties, and adjust the density.
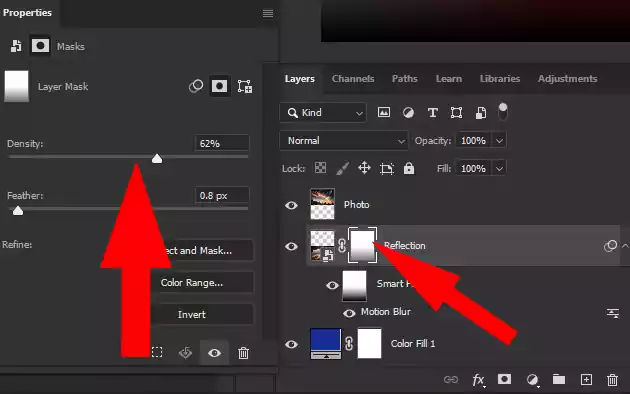
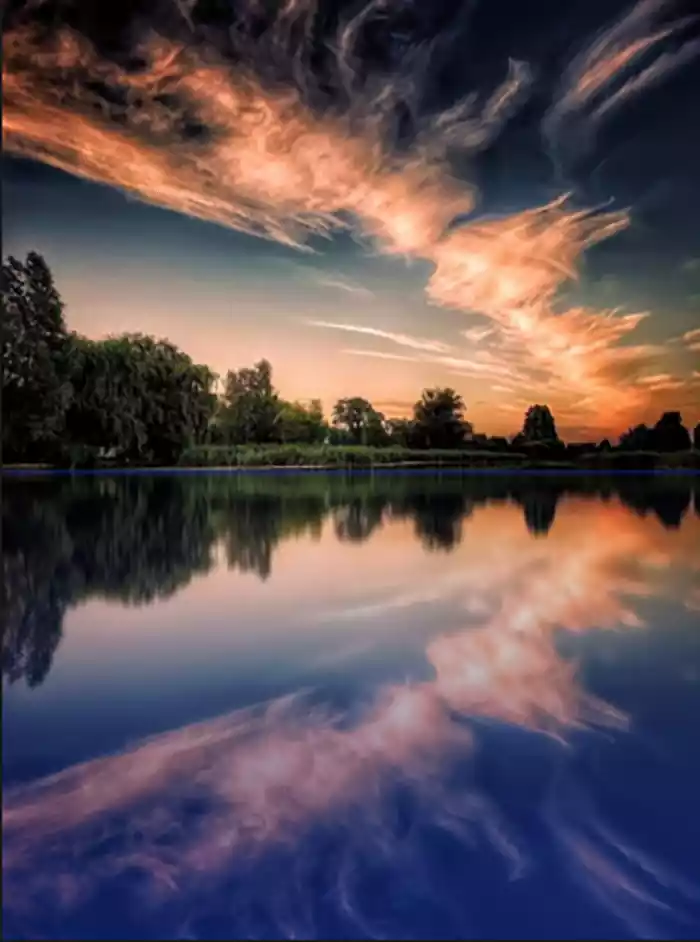
Select the Reflection and Fill layers and then select the Convert Smart Object from the layers panel menu to merge them into one layer.
You need water waves to make the water reflection effect in Photoshop look natural
9: Create a new document of the same size
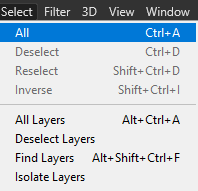
For the reflection to look natural in the water, we have to create water waves. To do this, we need a displacement map. Select Reflection, then go to the Select menu and click on All.
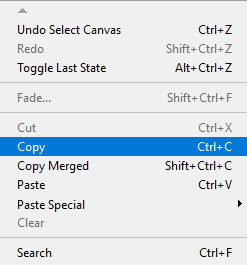
From the Edit menu, choose copy
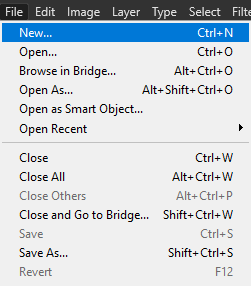
Go to the File menu and choose New. A new document dialog box will open. Click on Create. You will then have a new document of the same size.
10: Add Noise to a new document
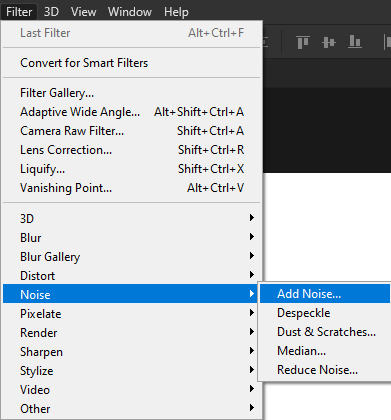
Go to the Filter menu, choose Noise, and then Add Noise in the new document.
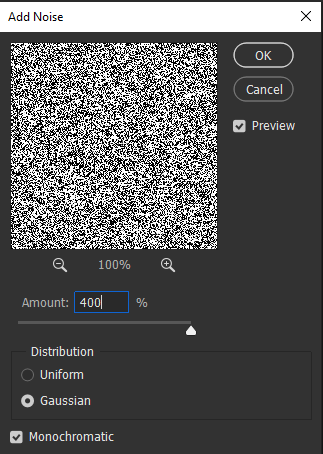
Set the Amount to 400, then click the Gaussian and Monochromatic. Noise will be added to the new document.
Go to the Filter menu and choose Blur, then Gaussian Blur. In the Gaussian Blur box, set the Radius to 2
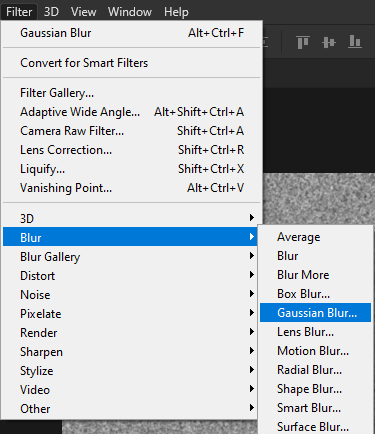
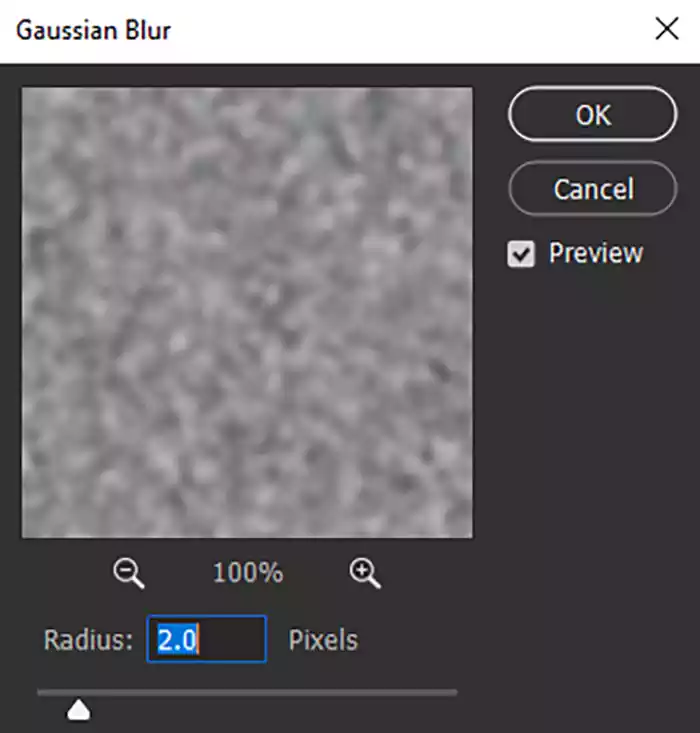
11: Add Emboss
Go to the Channels tab and click on Red.
.
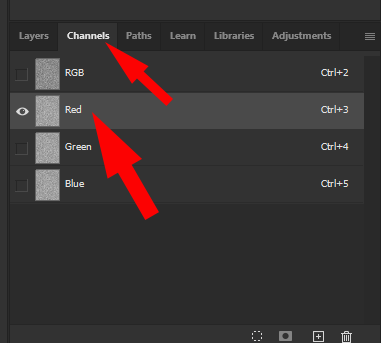
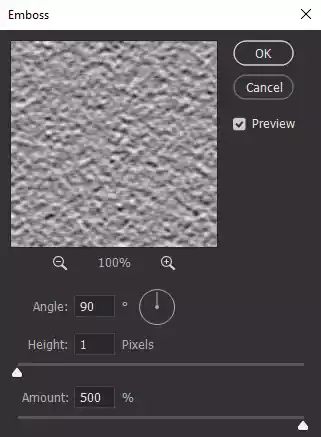
Go to Filter, then Stylize, and choose Emboss. The Emboss box will appear; set the Angle to 90, the Height to 1, and the Amount to 500%.
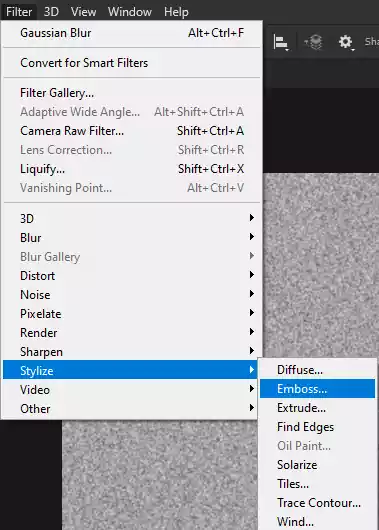
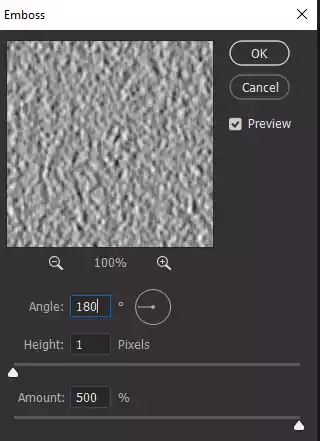
Now click on the green channel and add Emboss again, but set Angle to 180 this time.
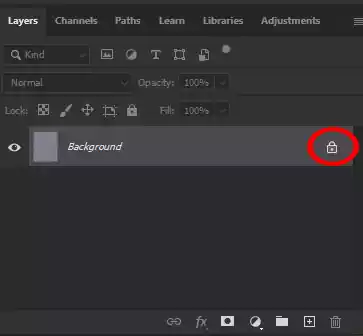
Choose the RGB channel and click on the Layers tab. Unlock the Background layer so that you can make further changes to it.
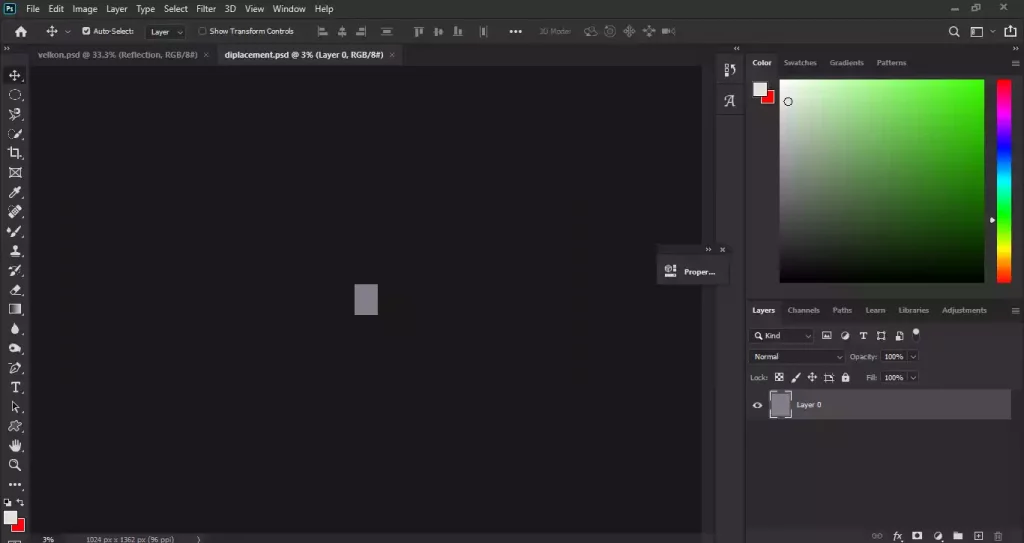
At this stage, we need to significantly change the document’s dimensions, so we need to make changes in the workplace. Use the Ctrl and—shortcut keys to zoom out.
12: Transform the image’s perspective
Select Transform from the Edit menu, then Perspective.
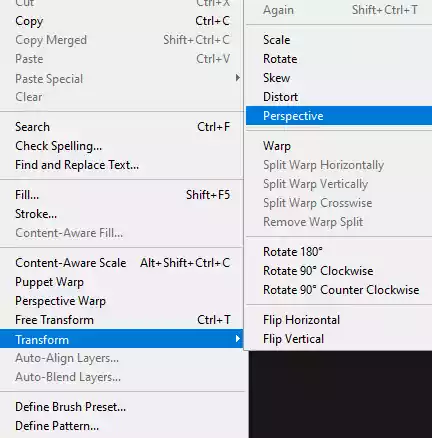
Click and drag the handle in the bottom left or right corner away from the image. The perspective view is necessary to show that water waves are natural.
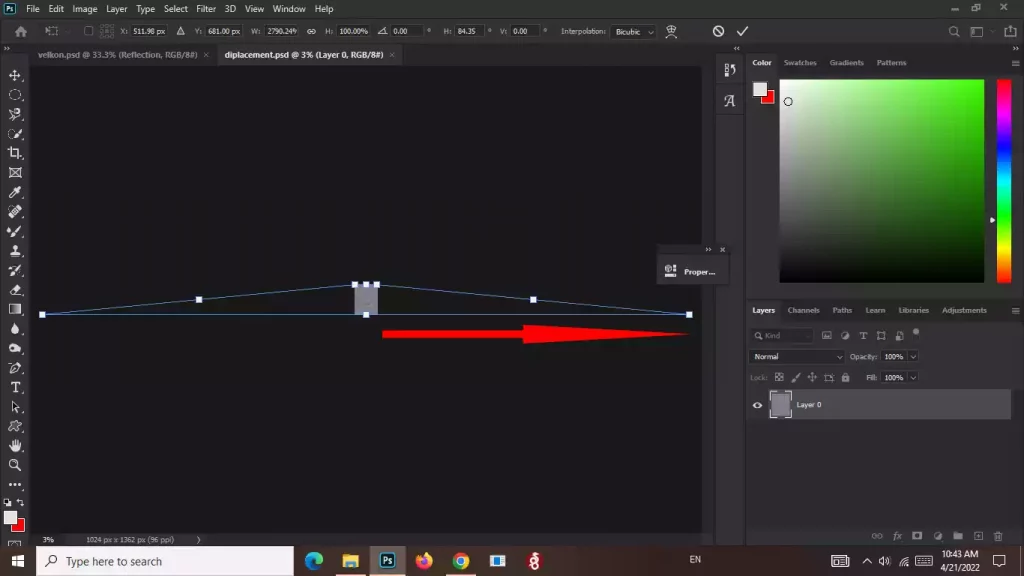
Press enter and zoom in. use Ctrl and + shortcut key.
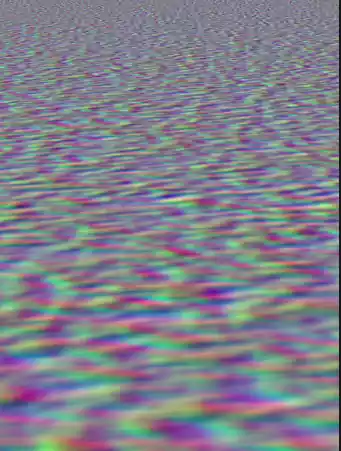
Crop away the hidden pixels on the sides to keep the file size modest and avoid any issues when saving it as a displacement map. Select All from the Select menu at the top of the screen. Around the image, a selection outline appears:
Crop may be found under the Image menu. Although it won’t appear that anything has changed, all of the concealed portions on the sides have been clipped away.
Then, deselect by using the Ctrl and d shortcut keys.
Since the map of our displacement is supposed to affect the lower half of the image, the picture’s scale must be changed. At the same time, the scale will improve the perspective.
Select Free Transform from the Edit menu. Click and drag the top handle down into the document’s center. Once you get near the center, it should snap into place. Press the Enter key.
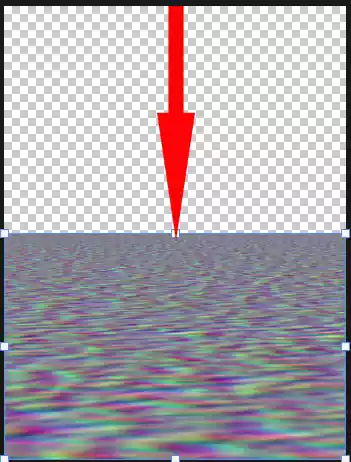
Now save your document in .psd format with the name “displacement.” Then, go back to the original document and open it.
13: َadd the Displace filter
To complete the creation of a water reflection in Photoshop, select the Reflection layer. From the Filter menu, go to Distort and choose Displace.
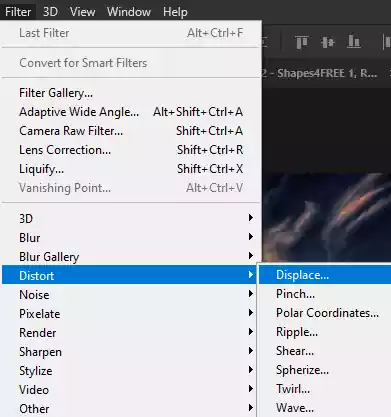
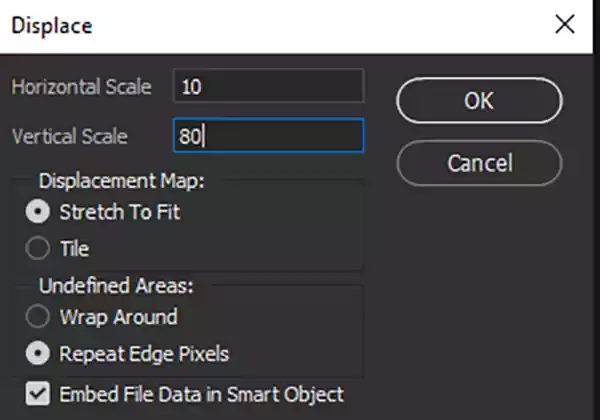
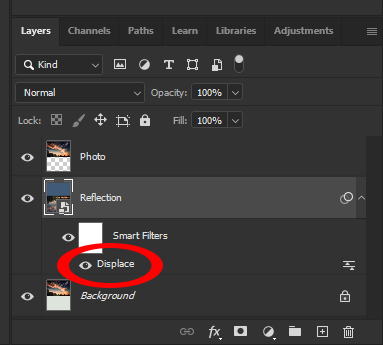
Set the Horizontal and Vertical Scales to 10 and 50, respectively. Set Stretch To Fit for Displacement Map and Repeat Edge Pixels for Undefined Areas. Depending on your image and experience, the vertical scale could be between 50 and 120. You can change the setting of the Displace box by double-clicking on Displcse.
14: Blue artifacts
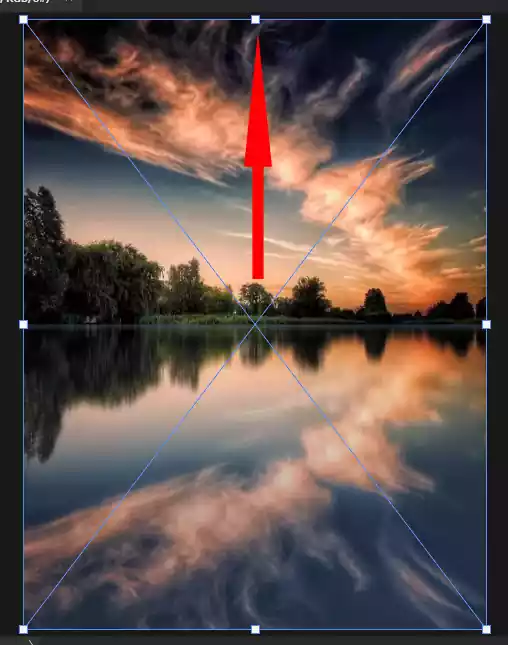
You see some blue artifacts caused by the displacement at the top of Reflection.

Go to the Edit menu and choose Free Transform. Photoshop will warn you, so click OK and go on. To expand the image, click and drag it slightly higher until the blue artifacts are covered behind the main image. Press Enter.
15: Hiding the boundary between land and water to normalize the water reflection effect
In some images, the boundary between land and water may be evident and sharp, and the viewer will notice that it is artificial and not an actual water reflection effect. In such cases, a thin strip of paint on the border is necessary.
The color type will vary depending on the background of your image.
To add color, add an extra layer to the top of the Photo layer, use the Rectangular Marquee Tool to add a narrow but long area to the new layer, and use the Fill in the Edit menu to paint the rectangle.
Depending on your desire, you can also set the new layer’s opacity to less than 100%. Because I did not have any problem with this picture, I did not add color.
